
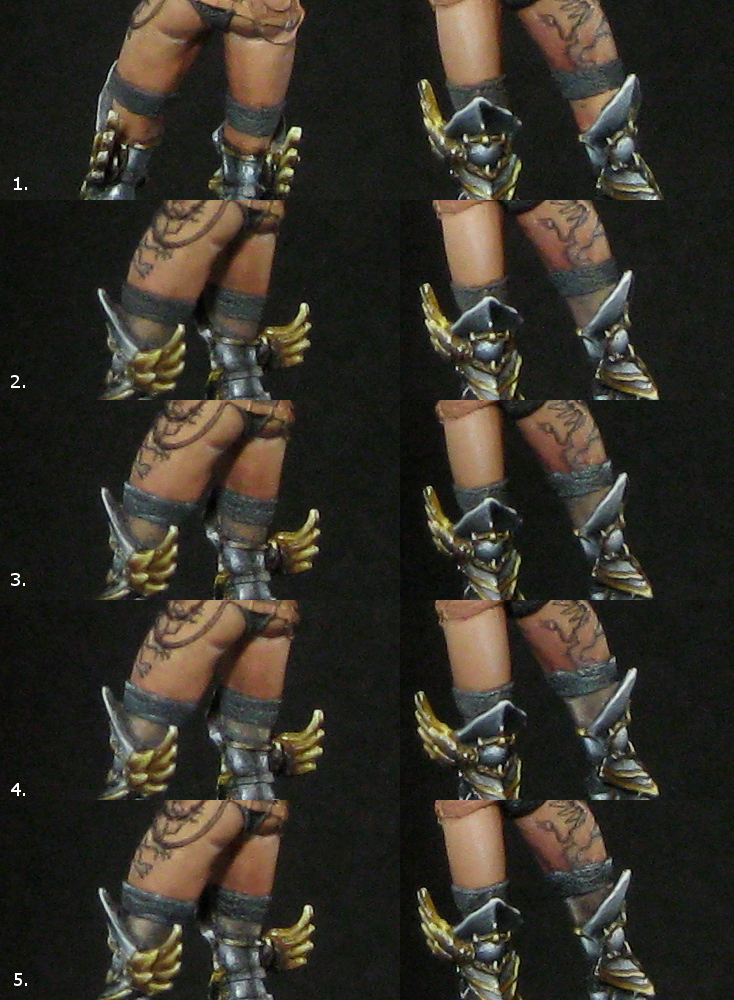
The stockings
The important bit about the stockings is getting the material to look sheer. That’s achieved by using lots of very thin layers of paint so that it still shows the colour underneath. In the previous post about painting skin, I had actually painted the flesh tone all the way down to the greaves.
- The first step is to paint in the stocking-tops. For this, I used VMC Black-grey.
- Next, is to paint the first transluscent layer on the rest of the stocking. I also used VMC black-grey here, but instead of blocking in the colour, I used very dilute layers of paint and built the colour up in a number of thin layers.
- I highlighted the stocking top using VMC Green Grey
- I also used grey green in very thin glazes to highlight the stockings. I tried to follow the positioning of the highlights on the metal greaves to keep up the illusion of reflection.
- I used pure black (plus a lot of water) to shade both the stockings and the stocking-tops
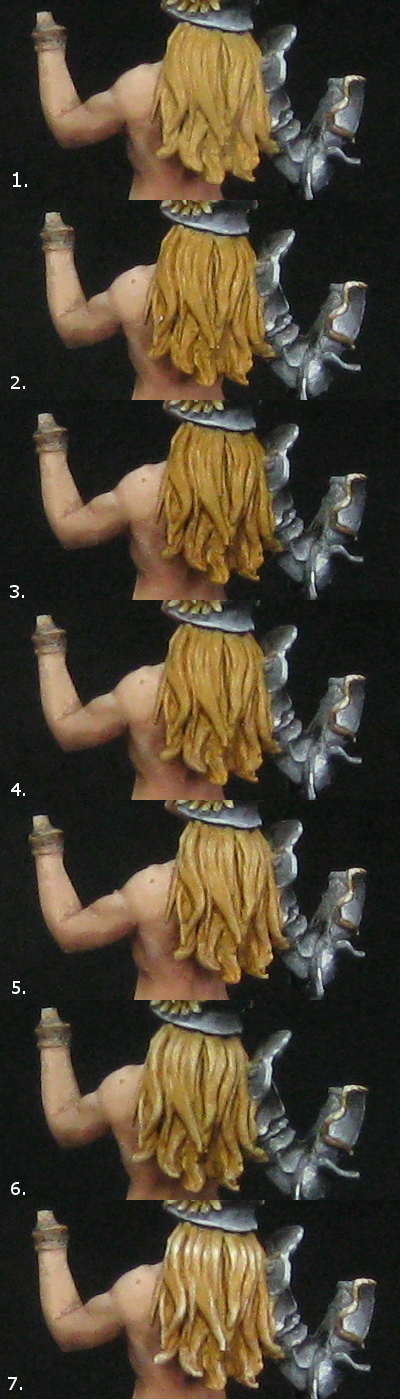
Her hair
The knack with painting hair is getting it to ‘shine’. With this in mind I try to look at it a little like non-metallic areas – I am going to highlight up to very fine points of light to try and show its reflective properties. I decided to go for blonde hair
- I painted her hair in P3 Rucksack Tan
- First of all I washed all of her hair in Citadel Seraphim Sepia
- The next step was a more directed was of Agrax Earthshade in the deeper recesses and the lower parts of the hair. You can almost see a second layer of hair under the top layer about half way down. That is where I added more shade.
- I repainted the raised strands of hair in Rucksack Tan
- I added Citadel Screaming Skull to Rucksack Tan and started highlighting the strands of hair focusing the lightest parts on the tips of some strands and a band just below the helmet.
- Then with pure Screaming skull I highlight the same parts of the hair but in a progressively smaller area.
- Final highlights with VMC Ivory to really make it pop – on the very tips of the hair and some fine dots along the strands in the band just below the helmet.
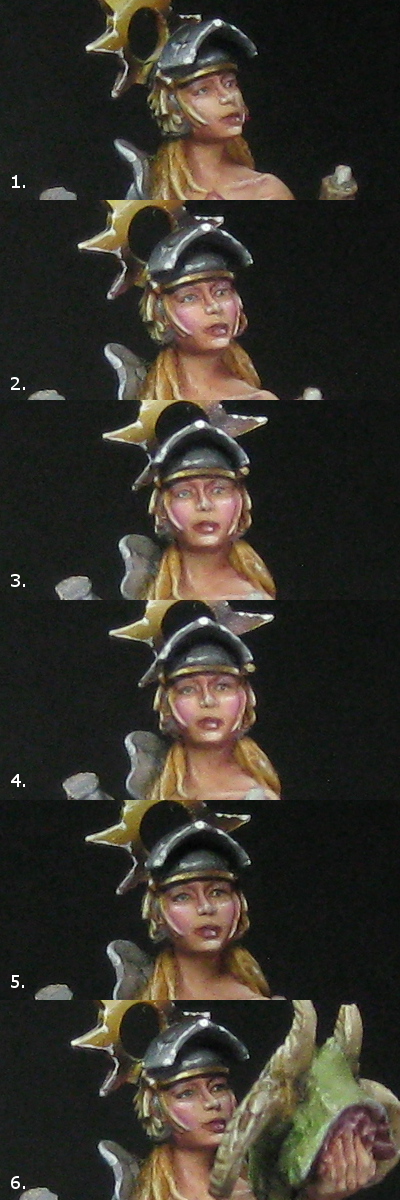
Her Face
We had already painted a lot of her face when we did the rest of the skin tone. You could leave it like that, but these next steps are a way of taking it a little further and adding more definition to the model. This is particularly important for the face of the miniature as it is always a focal point of a miniature.
- This is the face as we left it after the flesh tutorial
- I wanted to add some pink to her cheeks to bring some life to her face. I don’t really picture this as makeup but more a general warmth on her cheeks. I used Citadel Emperor’s Children in very thin layers so as not to overpower the miniature.
- Some more Emperor’s Children glazed onto her cheeks, and I added some highlights to the top of the cheek with P3 Carnal Pink. I also glazed a little of the Emperor’s Children onto her lips (although it is difficult to see from the photos)
- Next I worked more contrast into her eyes – I painted in a dark line on her top eye lid and also carefully re-emphasised her pupils using a very dark brown (almost black) as black tends to be too harsh.
- A thin glaze of the flesh (Tanned Highlight) over the flesh tones down the pink a little and brings the colour together. I also re-introduced the brightest highlights on the top of the cheek.
- And with the dragon’s head added for completion’s sake.
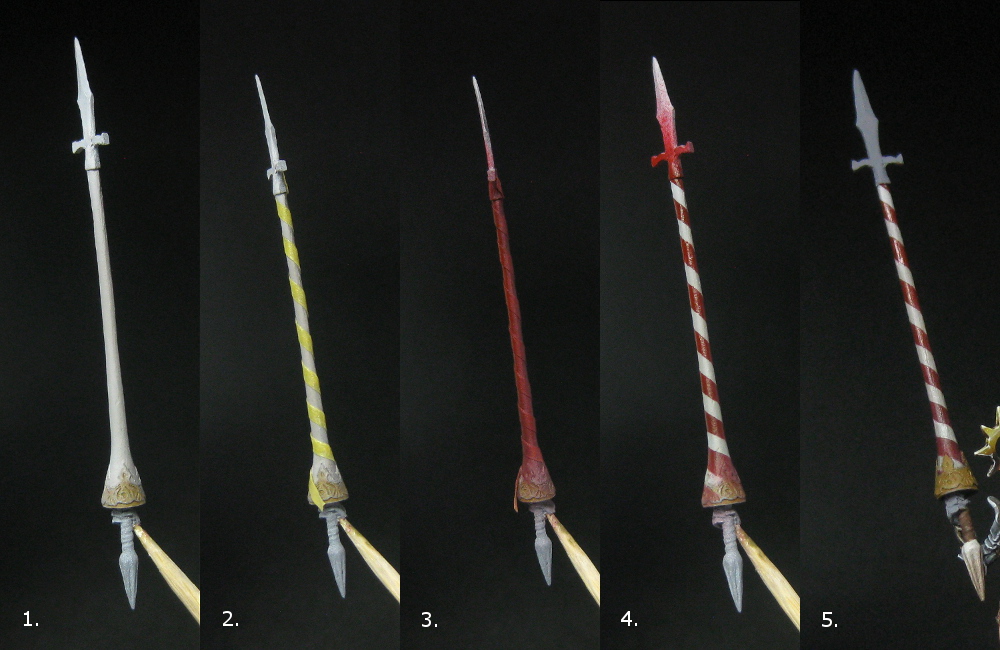
The Lance
The interesting feature with the lance is the red and white spiral pattern seen on the original artwork. I decided that the most effective way of paining this was with the airbrush, but there is no real reason that this wouldn’t work with a normal paintbrush.
- First of all I airbrushed the lance in Citadel Pallid Wytch Flesh and then sprayed one side with Citadel Rakarth Flesh as a shadow.
- I cut a thin strip of masking tape roughly 2mm wide and carefully spiralled it round the shaft of the lance.
- I sprayed the shaft of the lance in red and then the shaded side in P3 Sanguine Base.
- Once it was all dry, I peeled off the masking tape… a rather satisfying moment!
- The lance in situ with the blade and base blocked in with the start of the NMM.
In retrospect, I actually went the wrong way round the lance compared to the artwork, and that is something which will haunt my perfectionist mind for some time to come…
The Base
I wanted to do something different with the base and try a technique that I have not used before. I have a Citadel technical paint which is a crackle effect that I thought would make a great blasted earth scene. Lots of photos of this as there ended up being quite a few stages… The build, the crackle, the shade and the highlights.
Firstly, the build…
- The black plastic base supplied with the miniature
- 3. and 4. The foundation of the base is layers of 2mm thick cork bought as a roll from a craft shop. I have deliberately torn the cork rather than cut it so that you get a jagged edge which adds to the effect of the base. I have randomly added different layers to the base bearing in mind where I want to position the Gilded Saint’s feet.

Then the crackle…
- I sprayed the base black
- Then dark brown
- Followed by a light brown highlight in preparation for the crackle paint layer
- I then applied loads of Citadel Agrellan Earth crackle paint using the spatula end of a sculpting tool. Different thicknesses of paint give a different size of crack so I made sure some of it was on VERY thickly and other areas had less paint. Thick paint gives large cracks, thin paint gives small crackles.
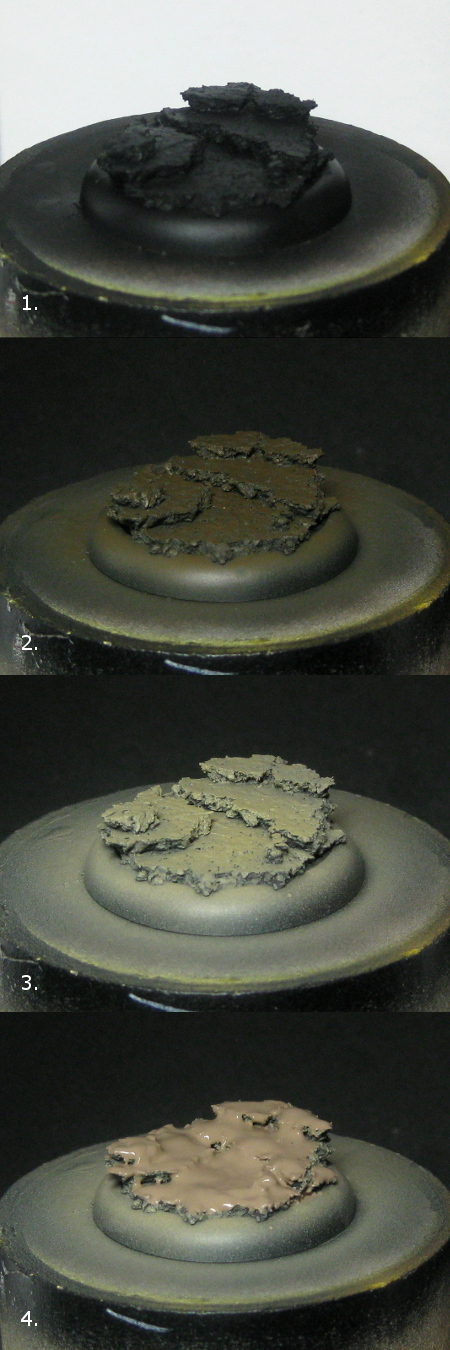
Followed by the shade…
- I left the base for 24 hours and came back to this cracked earth! It worked (phew!)
- I washed the entire base with Seraphim Sepia shade making sure a good amount got between the cracks.
- I washed more focused areas of Agrax Earthshade in the deepest parts of the round the cork layers and into the cracks.
- The first layer of drybrushing… yes, drybrushing…! Often mistaken as a beginner’s technique, it actually gives a great effect on a base like this as it really picks up the texture well and you can build up a dusty effect. This first layer was with Citadel Steel Legion Drab

The final stage is progressively building up the highlights and the depth of colour.
Drybrushing is the application of paint with very little paint on the brush. I use an old flat ended brush, pick up undiluted paint on the tips of the bristles and then wipe most of it off. The limited amount of paint means that it doesn’t flood into the details but sits on the raised surfaces.
Applying the paint to the base is done more in a sweeping motion rather than in any precise manner and it is this, along with the dryness of the paint, which helps create the dustiness.
- Drybrush with citadel Baneblade Brown (I think… when these were released one of the brown paints had Altdorf Guard Blue labels…)
- Then a layer of Screaming Skull drybrushed more towards the edge of the layers.
- A final highlight of Vallejo Model Colour Ivory drybrushed right on the edges of the steps to really make them stand out and enhance the three dimentional look.
- I applied thinned brown ink across the whole base but applying more to the middle of each level of cork to bring a richness of colour without totally destroying the dustiness.
- Paint the edges of the base black, and the base is done! All that is left is to attach the miniature.

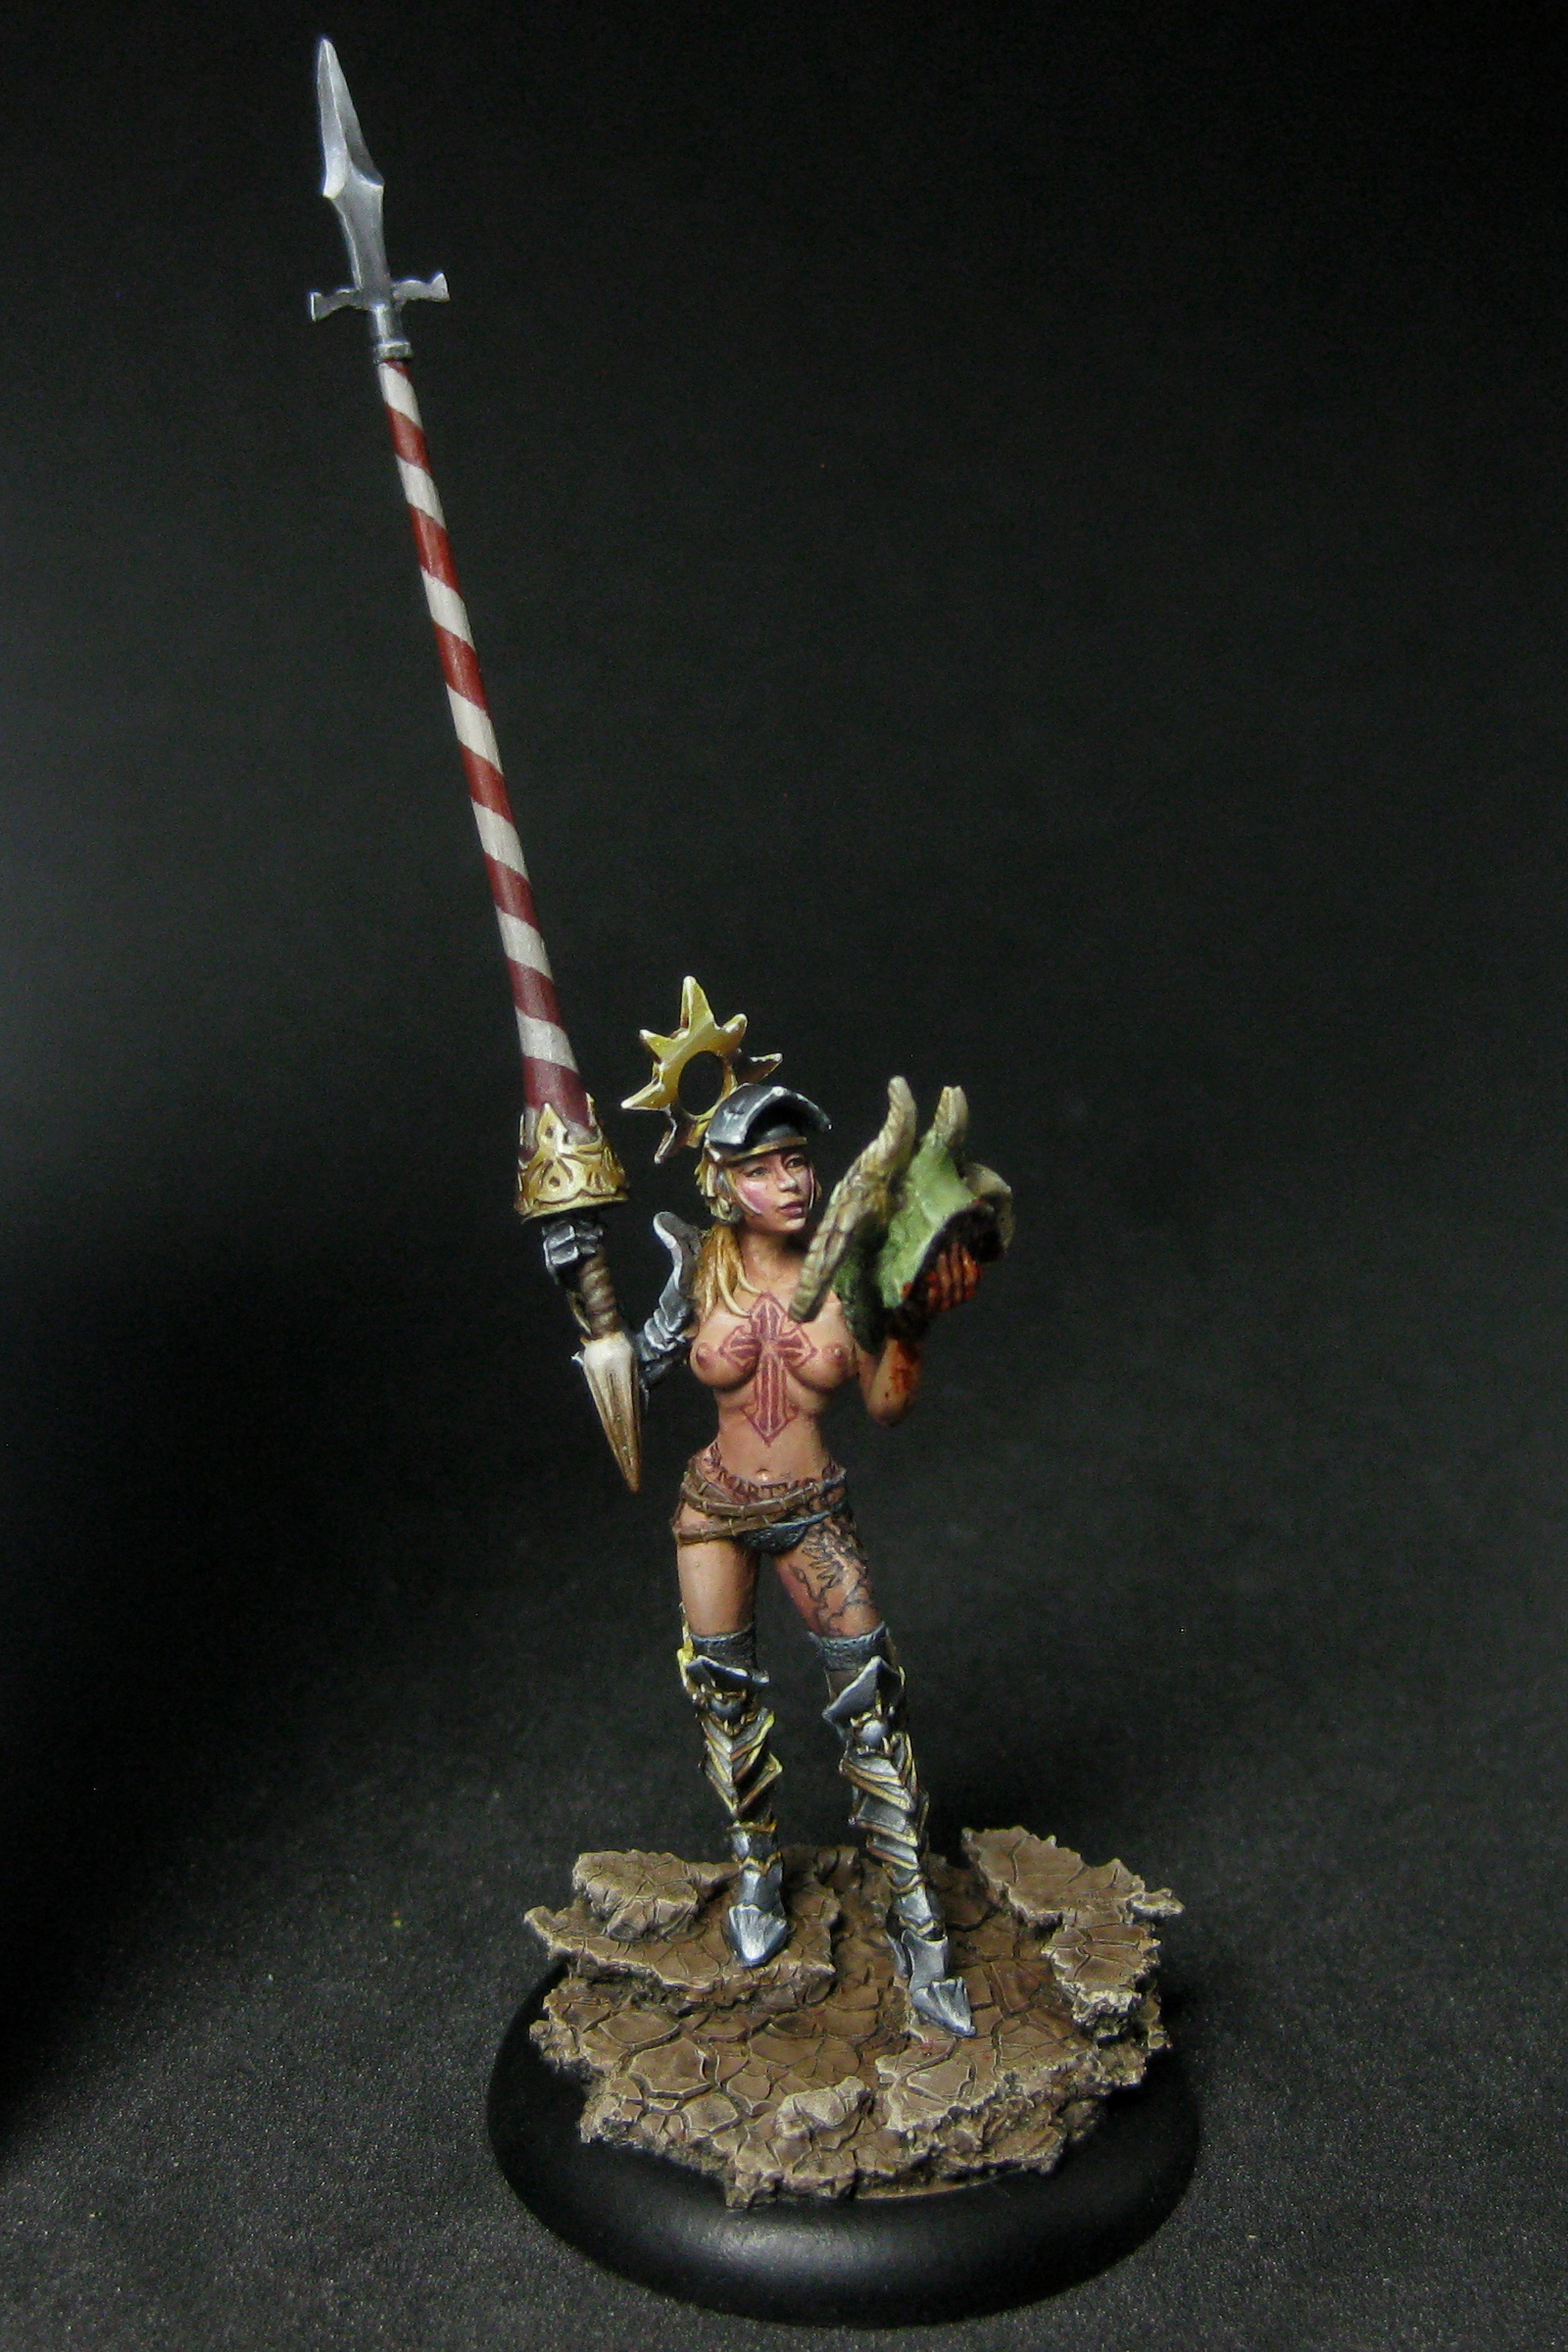
Put it all together and what do you get?
Ladies and gentlemen, I present to you, the Gilded Saint:

Totally awesome tutorial series!!
Cheers dude – glad you like it!!